Four Frames Photubooth
I love photographs. Their ability to capture a single candid moment of life. The play of light – black, white, shades of grey. Reminders of the people, places, and things that make life special. Ever since my friend Jim introduced me to photography as a teenager, I’ve had a special place in my heart for photography – taking pictures, post processing and darkroom, incorporating photography into my daily life and adventures, collecting vintage cameras, pushing myself to become a better photographer. Out of all my photographs, the ones I enjoy the most are candid shots of family and friends. So I suppose its a logic extension that I have a special interest in photobooths – the ultimate candid moment maker. Four Frames – four frames of uninhibited glory to do whatever you want. So with that love of photography and photobooths, TINKURLAB’s newest creation is the Four Frames Photobooth.
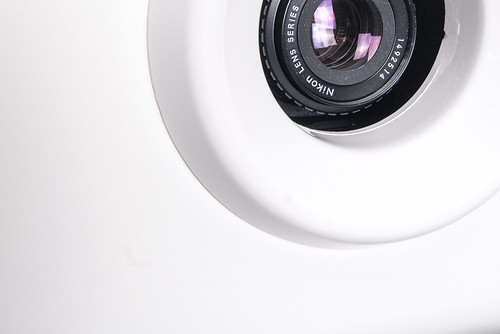
A modified a dryer duct diffuser provides a finished opening for the camera lens. The extra room in the opening enables adjustment of the camera height and angle for different shooting situations.
The Four Frames Photobooth is based on an earlier photobooth named Das Booth created for our 2010 Oktoberfest party – “Fest”. Das Booth had no housing, with all the components freely exposed – a Nikon D200 digital SLR camera, a netbook computer, an Alien Bee 400 watt studio strobe, DIY Photo Bits software, and of course a big button. All this gear was setup in a small shed attached to our house (from the 1950s – it has odd storage locations). We also spruced up the inside shed, hanging black fabric on the walls and adding a small bench for those who didn’t want to hang upside down, through the door, do handstands, etc. After entering the booth, partygoers pressed the button, struck a pose, and took 4x pictures. After a minute of inactivity, a slideshow of random photos began playing on the screen – almost as popular as the actual taking of photos. The photobooth was a hit, and ever since has been an staple of Fest.
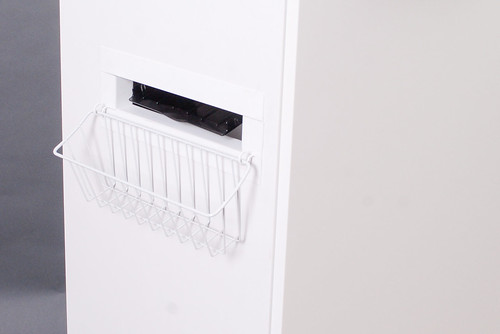
Photostrip catch basket catches photostrips as they leave the printer, awaiting pickup by event guests.
Envisioning
Fast forward to 2012, Val and I had 4 weddings to attend in 2012, three of which were interested in having a photobooth. So as Matt and I started talking about all of these upcoming weddings, his among them, we decided to take Das Booth to the next level – to build a photobooth that would be of high reliability and quality (aka pretty to look at) for use at his own weddings. That seemed like a good high level acceptance criteria. We continued to discuss “must have” features, and decided on the following:
Automated Photo Taking
- Show descriptive “how to start” instruction on screen
- Press button to start
- Take four photos
- High quality photos and lighting
- Save original photos and photo strips to computer
Print 2x Photostrips
- Print 2x photostrip of four photos
- Photostrips must be 2″x6″ (not 4″x6″ requiring manual cutting)
Highly Reliable and Self Sustaining
- Zero failures during event usage
- Take, store, and print 300+ photostrips of 4 photos each without materials replacement (paper, ink) during 5 hour event
Transportable
- Able to be set up in 30min or less by one person
- Able to be torn down in 30min or less by one person
- Must fit in a mid sized SUV
Well Packaged
- Look good
- Look professional
- Something we’d want at our own wedding / event and would pay money for renting
We also kept a backlog of other “nice to have” features that may be implemented in the future.
So with our features identified we set a deadline of the end of March 2012 to have the new photobooth fully completed and tested to ensure ample time for the bride and groom’s to make other plans if the photobooth wasn’t ready in time. And as things often go, we started working on the photobooth in mid April 2012 – two months before the first wedding, and well after our deadline. Hey, it was ski season! Gota get in the turns while you can.
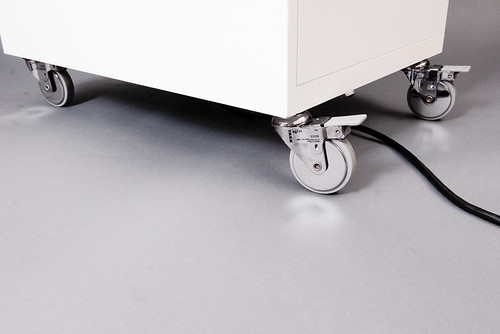
Locking wheels provide for mobility to and from the event location. A single 30′ power cord provides an umbilical for all power in the photobooth and is long enough to deal with far away electrical outlets – a common challenge at events.
Development and Testing
Because I already had a lot of confidence in the photography and automation aspects of the photobooth, our initial focus were on the largest risks:
Packaging
Packing (the housing for the photobooth) took the most time of the project. We were trying to keep the costs down, so we were constrained by finding materials that looked good, were durable, but could also breakdown for our transportation and speed requirements – all at a reasonable cost. Matt, Val, and I all set out working on designs – together and independently, finding examples of photobooths that we liked, creating sketches, and periodically reviewing together. In terms of material, we initially gravitated towards 80/20, dubbed the “industrial erector set, a system of aluminum stock and connectors that all work together to build almost anything. After learning a bit about 80/20 through online research, Matt and I created a specifications and a parts list. 80/20 is generally only sold through resellers, one of which offered to created a CAD schematic to validate the design – ours was spot on. After receiving quotes, the total cost for just the housing was coming to over $3000 – over our budget. The most expensive component were acrylic panels that would form the sides, top, and bottom of the photobooth. Realizing that spending so much money on a material we had never worked with, combined with the cost and looming schedule, I was hesitant to proceed. I also wasn’t happy with the look of the material – the design was busy – not simplistic and clean enough. So we did that anyone would do in such a situation – Matt, Val, and I went to Ikea and didn’t leave until we found the best possible solution – a large white cabinet of wheels that separated into two halves with a window on the top for the flash. About $200. Perfect. The exercise provided us a great constraint to work with what was available, and allowed us to move forward. We can always change the packaging in the future, after we’ve had some real world testing to learn more about the pros and cons. We also decided to make the photobooth “open”, not having any enclosure for partygoers. This is also something we can add in the future, but during testing we actually found out that allowing people waiting to use the booth to see people using the booth can actually create excitement and boost usage. Check.
Reliability
Das Booth was fairly reliable. But sometimes it locked up. Or crashed. Maybe one or twice during a party – but still too frequently for someone else’s event. It was also important to us that the photobooth be highly reliable, not requiring any maintenance during an event. Given the looming schedule, we decided to buy a reliable and cost effective photobooth software package. While we will certainly want to do custom scripting in the future and may develop our own software, we felt the best decision was to invest the $150 rather then potentially invest $1000s of our own time without having enough real world testing to learn more. After a few rounds of testing the software, we confirmed it was rock solid. Check.
Printing
The last major area that needed presented a risk was the photo printing. After consulting with a friend who is a sports photographer and does onsite printing, we decided to buy a HiTi dye sublimation printer – that same type used in professional photo labs. The printer uses a roll of paper which is capable of printing 330 4″x6″ photos without replacing ink or paper, and has an average print time of 12 seconds. As an added bonus, the printer also cuts a 4″x6″ photo into two 2″x6″ photostrips. Perfect. Check.
The first integrated test of the photobooth occurred one evening when George and Matt, two of the grooms, were over for dinner. What better way to convince potential clients then a demo! After setting up the gear in the middle of our living room, we took a few test shots. Awesome! I love how everyone just knows to act crazywhen there’s a photobooth. Both “clients” were convinced and we also got some great photostrips as well.
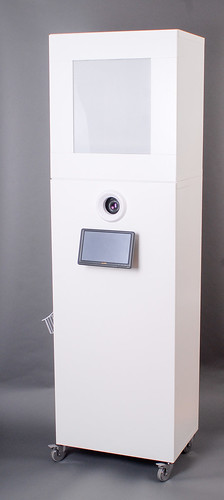
The finished photobooth, complete with flash diffuser, camera, touchscreen, and photostrip catch basket (left). A very clean design.
More to come in another post about alpha and beta testing (aka weddings), example photostrips, and what’s next. Stay tuned for posts in the near future. Until then, check out www.FourFramesBooth.com.
Parts
- Ikea Cabinet
- Fluorescent Light Cover Material (for flash diffusion)
- Nikon D200 camera and 28 f/2.8 lens
- Tripod Ball Head (for mounting camera to shelf and providing adjustability)
- Dryer Duct Diffuser (for camera lens cut in cabinet)
- Alien Bee 800 watt Studio Strobe
- Lug Bolt and Nuts (for mounting flash to shelf and general in cabinet mounting)
- Asus Netbook Computer
- Photobooth Software
- HiTi Printer
- HiTi Paper and Ink
- Wire Basket (for catching photostrips)
- Power and Data Cables
Four Frames v.Next Potential Features
- Interaction with social media (Facebook and Twitter)
- Allow users to tag photos or automatically tag using RFID or NFC
- Create interaction with other products (ex. Das Bot)
- Gamification
- Allow users to request reprints
- Taunts (when inactive, taunt users to take photos)
- Other Activation Methods (sound, motion, face detection)
- Random Timing (take random number of photos and/or random timing)
-Adam

Comments ()